Showing posts with label clay. Show all posts

Tuesday, May 4, 2010

How to Make a Clay Polar Bear


This is a clay Polar Bear project I just completed with Grade 3.


Take a slice of clay and roll to about 1/2 inch thick.

Cut a nice oval base with a wooden skewer.


Using your finger dipped in water smooth the jagged edge left from cutting.

I explain to the students that if we leave this edge that once this piece is fired this could be very sharp and might cut someone.


Take some clay and form 2 back legs and 2 smaller front legs.


Using the "scratch, scratch, water, water" chant we attach these legs to the base.

We want to be sure the 2 surfaces that are touching have been sufficiently scored and moistened so that our clay will "glue" together.


Taking a fair lump of clay (palm sized) form a pear or gourd shape for the body.

Place it on the 4 legs and continue refining until you are happy with the shape.  Attach to the 4 legs with the "scratch, scratch, water,water".


Continue to define the shape and pinch out some ears.  You want a pointy nose.

I had reference photos for the kids to look at while sculpting.


Using a toothpick we added our names and the year to the base.


Leave bears to dry out for about 2 weeks.

After completing a bisque fire in the kiln, glaze using white and blue underglaze with a clear topcoat.

and that's it!  The grade 3's did an awesome job.
See you next time.

Wednesday, March 24, 2010

Bead and Clay Crosses


This is a project I do at Easter time with the students.  These are done by Grade 1. I also did this with Grade 4 this year using smaller beads and more complicated patterns.


Click on picture to see larger.


You need to do up a recipe of salt dough clay. ( 1 recipe is enough for 24 crosses using a 3 1/2 inch cutter)

4 cups flour
1 cup salt
2- 2 and 1/2 cups warm water

Knead into a soft dough
Store in a ziploc bag.  If not using right away you can store in the refrigerator for like forever. Just pull it out ahead of time to come to room tempertaure before using.


I like to color the dough.  Using liquid tempera or acrylic paint squirt some on the dough.


Fold over the dough.


and then knead like crazy....don't worry if it looks marbled like this it just means you have to keep kneading.


It will eventually look like this.  Even color throughout.


Roll it out and then using a cookie cutter cut out the shape.


Place a paper clip 1/2 way in at the top for hanging.

I get the kids to put a bit of water on the surface of the cross using their finger and then they can start forming their design with beads.  We use pony beads in different sizes as well as wood beads and large decorative beads.


I asked them to try and make a pattern using color or shape.


They need to push the beads in fairly firmly.


I then place them on a cookie sheet lined with parchment paper.  I write the name of the student on the paper in sharpie and then place their creation either on top or next to their name.  This allows me to keep them straight until they are baked when I can then write their names on the back in sharpie.

Bake in a 250 - 300 degree oven for about 2 - 3 hours until hard.  You don't want to overbake and have them get a brownish tinge.


When cool add a coat or 2 of Mod podge.  This will help "glue" into place any loose beads as well as add a nice shiny finish.

Keep in mind that salt dough responds to the humidity in the air.  It can sometimes feel soft even after baking and sealing.  Just let it be and it will dry out again. 


That's it.  I add a ribbon thru the paper clip at the top and the kids have a great creation to take home for Easter.


See you next time.

Tuesday, February 23, 2010

Clay Inukshuks


For the last few years the Grade 2's have been making these clay Inukshuk scenes.  Studying the Inuit is part of the social studies curriculum and this fits in nicely.  This year it is an added bonus that the Inukshuk is the symbol of the Vancouver Olympics.


You need to slice off a 2 inch slab from your clay block.  If you don't have access to a kiln you can make one out of air dried clay.  Roll your piece out flat until it is about 1 to 3/4's of an inch.


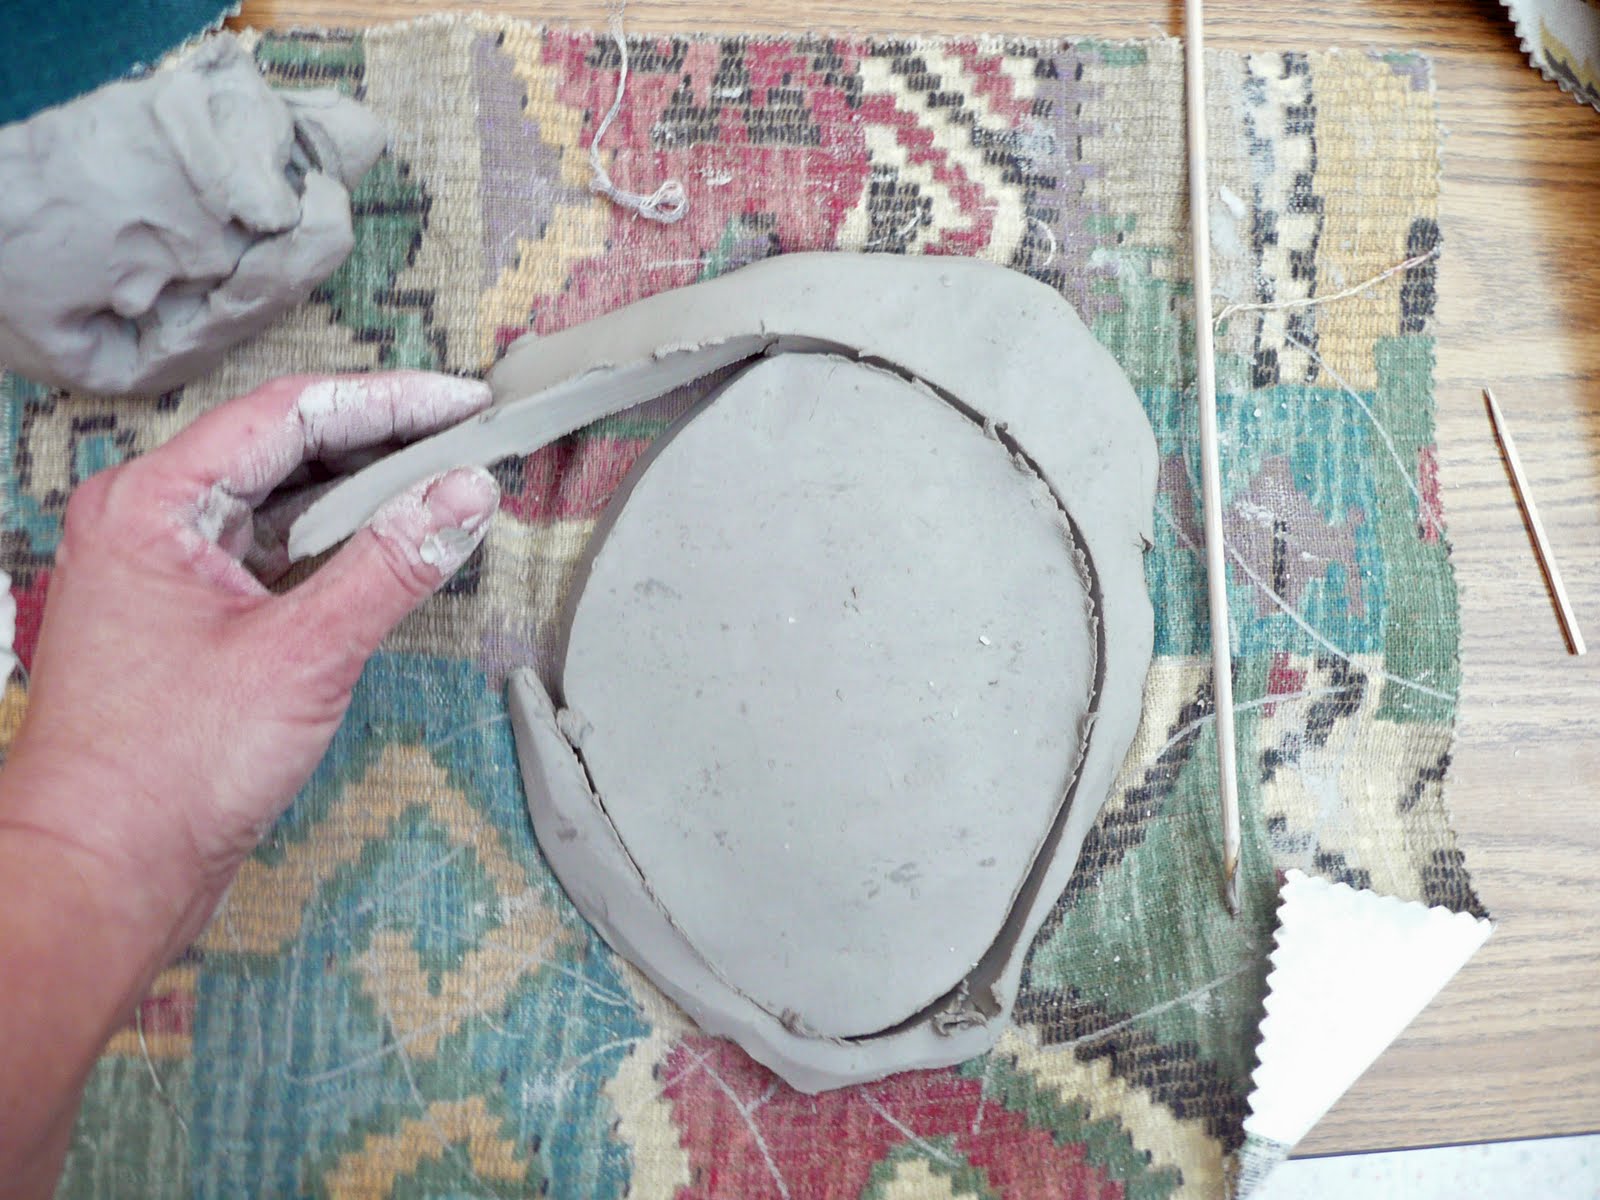
Taking a wooden skewer (best tool for cutting) cut out a nice egg shape approximately 8 inches long.


Dip your finger in water and smooth the edge of this cut.  You don't want a jagged cut because after it bakes in the kiln this edge can be quite sharp. (ouch!)


Take your egg and fold it up smooshing the back a bit to form a good supportive seam.  You can also turn up the corners a bit to give this shape extra support.


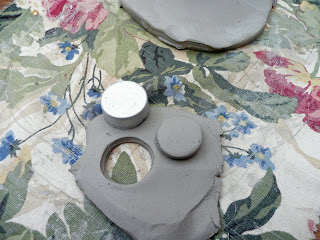
Using a cookie cutter, old tomato paste can , or in our case a small metal case that normally would hold beads..cut out a small circle for your sun.

To glue this onto your scene make sure you score the back of the circle as well as where you want it to go ...add a touch of water and stick into place.  The kids all know to "scratch, scratch, water, water" to glue pieces of clay together.


You can scratch in some rays for your sun.


The next thing to do is to cut out the rectangular shapes for your Inukshuk.  They will be glued (scratch,scratch,water,water) onto the back of the scene so you don't have to make them too thick.

It should look something like this.

You now need to start forming your Inuit hunter.
Make a body shape and attach to the base.


Roll a head between your palms and then roll a long snake.


Attach this to your head to represent the fur around the collar of the coat.


Make sure to scratch in your face.


Glue (scratch,scratch,water,water) into place onto of the body.  Roll a second snake to form the arms and attach as one piece onto the back of the body.  I usually have to remind the kids that arms come from the shoulders and not the waist as they always seem to want to attch them there.


You can start adding rocks to make your fire circle.  Just scratch the base and don't worry about scratching each individual rock.


Finally they can add some fish.


It should look something like this.


Put the completed scenes somewhere safe and warm to dry.


I usually have them loosely covered with a garbage bag for 24 hrs. (that way they don't dry out to fast leaving cracks)  I then remove the bag and let them fully dry out for about 2 weeks.  This ensures we have no mishaps in the kiln.


After they have dried out carefully load your kiln and bisque fire.


We decided to paint ours with acrylics to get a nice opague (dense) color but you can also use glaze and fire again.


The kids were instructed to paint the sky and snow first and then all the details.

After letting the paint cure for 24 hrs I'll seal them with a glossy acrylic medium or sealer.


That's it.  Sorry this photo is not the best...the skylights at the school always mess me up...good natural light to work under but washes out my photos.


Give it a try and I'll see you soon.

Sunday, December 13, 2009

Christmas Clay Projects - Poinsettia Candle Holders


Here is a clay project Grade 6 has been doing for the last several years....a clay Poinsettia candle holder. (Great project Mr. Z!). You could also make these out of salt dough or air dry clay (Prang) if you don't have access to a kiln.

I was helping out last week but forgot to take pictures of the process so you'll have to settle for my notes.
Take a slice of clay and roll out to about 1/2 inch thick. Using a skewer cut 10 petals. You can use my template Poinsettia Petal.


Starting with the bottom layer...lay out 5 petals, slightly overlap them. Scratch and add a little water on the surfaces that touch in order to "glue" them together. You want a solid center so squish the clay together to form that center.

The second layer of petals goes on top of the bottom layer but the petals lay in between the space of the petals of the bottom.


Something like this....click on pictures to see larger.

We used a cup that was the same size as a votive to make an impression in the center...this is where the candle will go.


We then rolled out 5 small pea sized balls and set them around the outside of this impression at equal intervals. Remember to "scratch, scratch,water, water" all surfaces that are touching to glue them together.
They had an option of curling up their petals if they wanted and they scored the veins on their petals for texture.


They should look like this when finished. Let dry for 1-2 weeks, bisque fire, glaze, and then fire again.

If using salt dough or air dry clay, paint with acrylic and add a coat of Mod Podge to seal.


This is the one my daughter made last year. Grade 6 will be glazing theirs this week.


I have a simple paper Christmas Tree to post as well. We will be doing it for Christmas Craft Day which is being held on Friday Dec 18th.
Unfortunately the weather has been so gloomy I have been unable to get any decent photos and my photo assistant has been getting in the way!
I'll wait till tomorrow to see if I can get some good natural light.
See you soon.